The Asphalt Shingle Roof Installation Process Explained Step by Step
People searching for asphalt shingle roof installation are typically looking to have a durable, properly installed roof, and local contractors can expertly handle every step of the process.
Understanding the asphalt shingle roof installation process explained step by step can be invaluable for property owners considering a new roof or replacement. Whether planning a renovation or simply exploring your options, knowing what to expect helps ensure a smoother experience. Homeowners in the area often seek out this information to make informed decisions about working with local contractors who specialize in asphalt shingle roofing, ensuring the project aligns with their property’s needs and their own expectations. Keep reading to gain practical insights into each stage of the installation, and discover how local service providers can help bring a quality, durable roof to life.
Getting familiar with the step-by-step process provides clarity on how asphalt shingle roofs are installed, highlighting the importance of proper preparation, material selection, and craftsmanship. Property owners who understand these details can better evaluate proposals from local contractors and ensure the work meets their standards. Local pros offer expert services to handle each phase of the installation, making the process more manageable and helping to protect the investment in the property. Continuing to explore this topic can empower homeowners to make confident choices when it’s time to upgrade or replace their roof.
- Asphalt shingle roof installation is needed when replacing an aging or damaged roof, and local contractors follow a systematic process to ensure proper setup. New asphalt shingle roofing is suitable for homeowners upgrading their current roof, with service providers carefully preparing the roof deck before installation. Roof replacement with asphalt shingles is essential after severe weather damage, and local pros handle the removal of old materials to prepare for new layers. Installing asphalt shingles on a new structure is ideal for building projects, with contractors expertly applying each shingle to ensure durability. Re-roofing with asphalt shingles is common for extending the life of existing roofs, with local service providers managing the entire process step by step.

When homeowners search for the asphalt shingle roof installation process explained step by step, they are typically looking to understand what’s involved in replacing or installing a new roof using asphalt shingles. This topic often relates to plans for a roof upgrade, repairs after storm damage, or the construction of a new property. Many property owners want to know what to expect during the project, how long each phase takes, and what kind of preparations or decisions they need to make. Understanding the process helps homeowners feel more confident about working with local contractors and ensures they are aware of the key steps involved in completing a durable and functional roofing system.
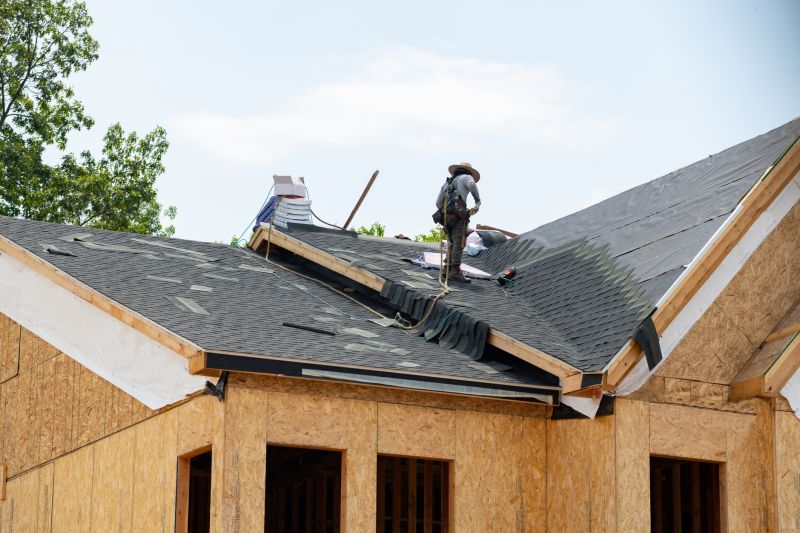
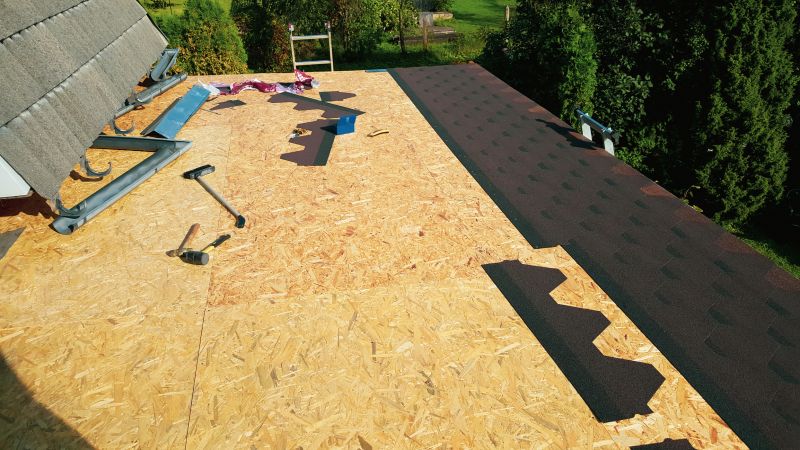
The process generally begins with a thorough inspection and preparation of the existing roof or roof deck. This step is crucial for identifying any underlying issues that need addressing before new shingles are installed. Once the surface is ready, local service providers typically remove the old roofing materials, if necessary, to create a clean and stable base. Next, they install the roof’s underlayment - a protective layer that adds waterproofing and insulation. This phase ensures the roof is properly sealed and prepared for the asphalt shingles, which are then carefully laid out, aligned, and fastened according to best practices. Each of these steps is essential for a long-lasting roof that can withstand weather and environmental factors.
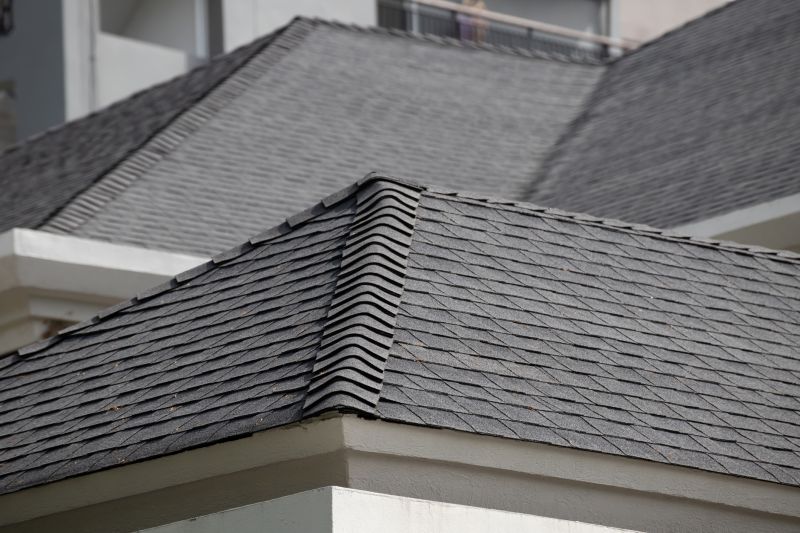
The installation of asphalt shingles is a detailed process that requires skill and precision. Contractors usually work from the bottom edge of the roof upward, overlapping each row to create a water-resistant barrier. They pay close attention to proper nail placement and shingle alignment to prevent issues like leaks or wind damage. During this phase, local pros also install flashing around roof penetrations such as vents, chimneys, and skylights, which helps direct water away from vulnerable areas. The final steps often include trimming shingles to fit edges and valleys, ensuring a clean and professional appearance. Proper installation techniques are vital to maximize the lifespan of the new roof and protect the property underneath.
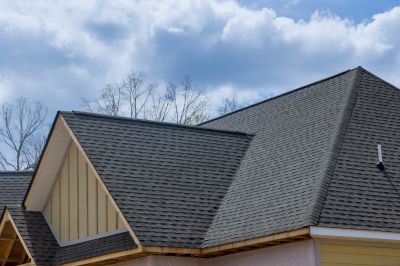
Once the asphalt shingle roof installation process explained step by step is complete, the focus shifts to inspection and cleanup. Local service providers typically review the entire roof to ensure all shingles are securely fastened and that flashing and other components are correctly installed. They also remove any debris, leftover materials, or tools from the site. Homeowners can then inspect the finished work and discuss maintenance tips or warranty details with the contractors. This comprehensive process ultimately provides a durable, weather-resistant roof that enhances the property's value and curb appeal. Connecting with experienced local pros ensures that each step is performed correctly, contributing to a successful roof installation project.
Roof Inspection Services - professionals who assess roof conditions and prepare for installation projects, similar to evaluating the surface before starting the asphalt shingle roof installation process explained step by step.
Roof Deck Repair - specialists who repair or reinforce the roof deck, a crucial step often involved in ensuring a proper foundation for asphalt shingle installation.
Weatherproofing and Waterproofing Services - providers who apply protective barriers to prevent water intrusion, aligning with the waterproofing considerations during roof installation.
Roof Ventilation Installation - contractors who install or upgrade ventilation systems, which are essential components often addressed during the roofing process explained step by step.
Flashing and Edge Detail Services - experts who install or repair flashing around roof edges and penetrations, similar to the detailed work involved in the step-by-step installation process.
Gutter and Drainage System Services - specialists who ensure proper water runoff, supporting the overall effectiveness of a new asphalt shingle roof installation.
When evaluating local contractors for asphalt shingle roof installation services, it is important to consider their experience with similar projects. A contractor who has a history of completing asphalt shingle roof installations can demonstrate familiarity with the specific steps involved in the process, from preparing the roof deck to applying the final shingle layers. This experience often translates into a smoother installation and a better understanding of potential challenges that may arise, ensuring the work aligns with the expected standards of quality and durability.
Clear written expectations are essential when comparing service providers. Homeowners should seek detailed descriptions of what the installation process will entail, including the scope of work, materials used, and the sequence of steps involved. Service providers who can articulate these details in writing help ensure that homeowners have a shared understanding of the project, reducing the risk of misunderstandings or surprises. This transparency also provides a basis for evaluating whether the contractor’s approach aligns with the homeowner’s goals for the project.
Reputable references and strong communication skills are key indicators of a trustworthy contractor. Homeowners are encouraged to ask for references from previous clients who had similar asphalt shingle roof installations. Speaking with past customers can offer insights into the contractor’s reliability, professionalism, and quality of work. Additionally, good communication-such as timely responses to questions and clarity in explaining the process-can make the entire project experience more straightforward and less stressful. When comparing local service providers, these qualities help ensure that the chosen contractor is capable of managing the installation process effectively and keeping homeowners informed throughout the project.
Property owners often search for the asphalt shingle roof installation process explained step by step when they are planning practical projects around their homes and businesses. Local pros provide Asphalt Shingle Roof Installation services for everyday jobs and straightforward project options.

Understanding the asphalt shingle roof installation process explained step by step can help property owners in the area gain a clearer picture of what to expect when replacing or installing a new roof. Many homeowners seek this information to ensure their property is prepared for the project, to better understand the scope of work involved, and to make informed decisions about hiring local contractors. Since this process involves several stages-from removing the old roofing material to installing the new shingles-knowing what each step entails can help property owners feel more confident about the work being done on their homes.
Local contractors who specialize in asphalt shingle roof installation services are experienced in managing each part of the process efficiently and effectively. Property owners often look for these services to ensure the job is completed properly, with attention to detail and quality. By understanding the general steps involved, homeowners can better compare service providers and choose local professionals who are capable of handling the project from start to finish, ensuring their home’s roof is durable and well-installed.
What are the main steps involved in the asphalt shingle roof installation process explained step by step? The process typically includes removing the old roofing, inspecting and preparing the roof deck, installing underlayment, laying down the asphalt shingles, and finishing with flashing and ventilation details. Local contractors handle each of these steps to ensure a proper and durable installation.
How do local contractors prepare a roof before installing asphalt shingles? They start by removing existing roofing materials, inspecting the roof deck for damage, repairing or replacing any compromised areas, and then installing a weather-resistant underlayment to create a solid base for the shingles.
What materials are used during the asphalt shingle roof installation process? The main materials include asphalt shingles, underlayment, flashing, nails, and sometimes additional ventilation components. Local service providers ensure the right materials are used for the specific roof and climate conditions.
Why is proper installation important in the asphalt shingle roof installation process explained step by step? Proper installation prevents leaks, extends the roof's lifespan, and ensures the shingles perform as intended. Experienced local contractors follow best practices to achieve a quality, long-lasting roof.
Can local contractors customize the asphalt shingle roof installation process to suit different roof types? Yes, they can adapt the process based on roof design, pitch, and other factors to ensure the installation is effective and meets specific structural requirements.
Understanding the roof inspection stage helps property owners identify potential issues before installation begins, ensuring the project starts on a solid foundation with local contractors.
Knowing how materials are prepared and laid out allows property owners to plan for proper ventilation and insulation adjustments during the asphalt shingle roof installation process.
Learning about the step-by-step installation methods can assist property owners in coordinating other home improvement tasks around the work of local service providers.
Recognizing the final inspection and cleanup process ensures property owners can confirm the quality of the installation and prepare their space for safe, long-lasting results.
If you are thinking about the asphalt shingle roof installation process explained step by step for a property, this guide is meant to help you understand this topic, the typical project types, and how different options might fit your plans.
When you are ready, you can use the quote form on this page to share a few details about your project. From there, local pros can review the basics and follow up with options that match what you have in mind.